Free Access
Free Access over Splash page can be set in a couple of clicks.
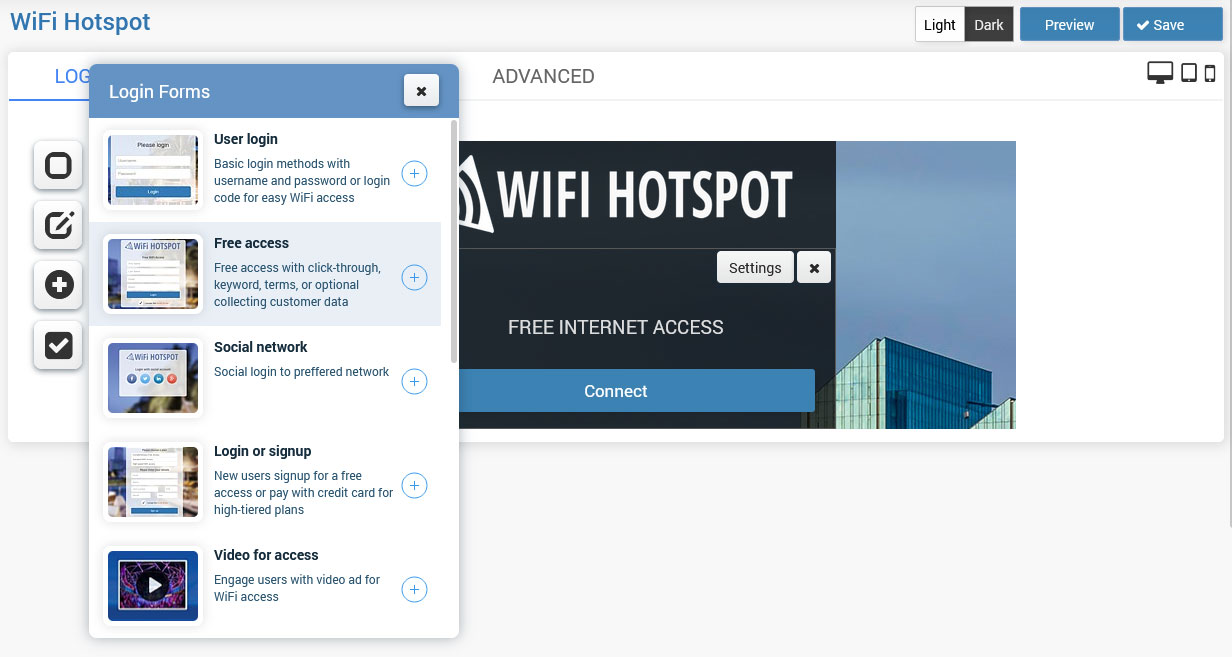
Available free access forms are:
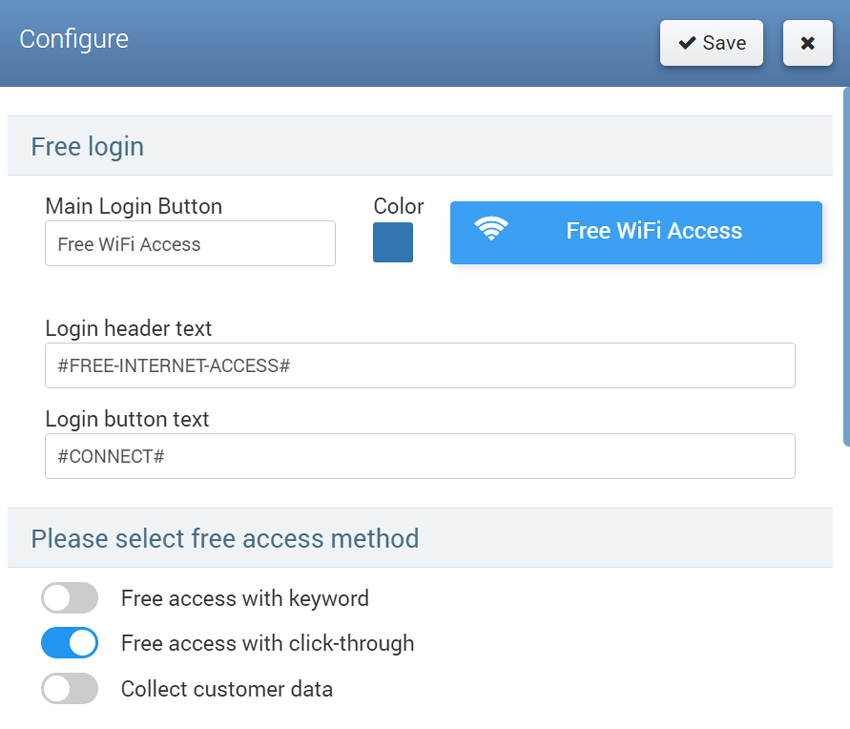
– Free access with a click-through
– Free access with a keyword
– Free access with collecting customer data
When you click on the + button, this login form will be added as the access method.
By default, Free Access is set to Free access with click-through.
Free access can be configured from the Settings page configuration menu.
No matter which free access type is used, you can change the Login button text and enable Email verification based on verification API.
Free access with click-through doesn’t require additional configuration.
Free access with keyword requires the setup of keywords for access.
Free access with collect customer data requires selecting which of customer details and are they required or not for access.
Press on Save button to apply changes.
This way will get a Splash page from which will be an active Free access login method.
Email Verification
Verify Email with activation link
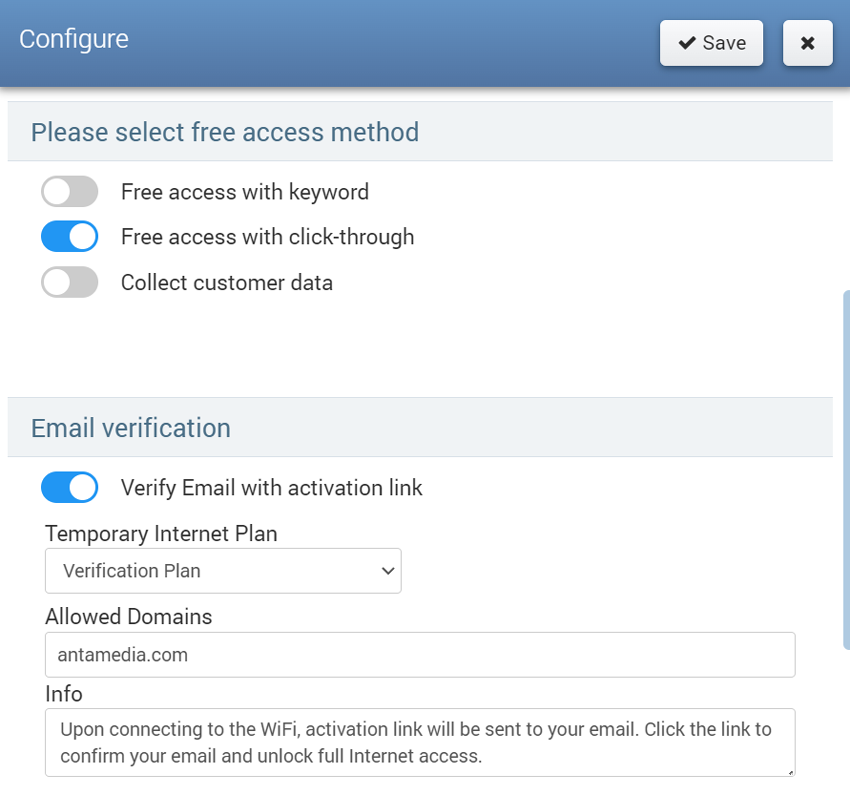
Before proceeding, make sure to create a temporary internet plan specifically for the verification process. This plan will not be visible on the Splash page.
For a quick and hassle-free verification process, it is recommended to set up a Temporary Internet plan with time and expiration limits of at least 3 minutes.
On the Splash page / Free Access Settings go to Email verification section to enable Verify Email with activation link option.
Optionally, you can specify Allowed domains (e.g., your company email) and include an Info message.
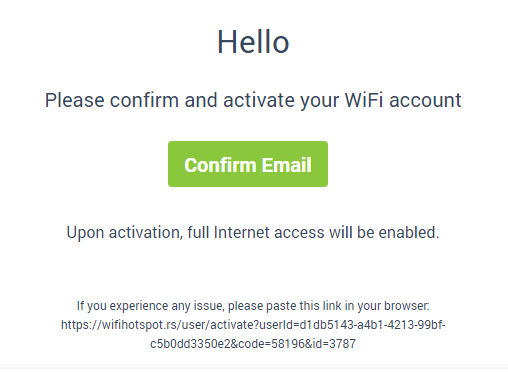
Upon connecting to the WiFi, activation link will be sent to customer email. Customer will click the link to confirm email and unlock full Internet access.
Verify Email API
Enable the Verify Email API, enter the Verification API, and save changes.
Related Articles
Creating free or Paid wifi on SocialWiFionline
Creating free or Paid wifi on SocialWiFiOnline SocialWiFionline Cloud WiFi solution helps you to create free or paid WiFi HotSpot. The advantage of our solution is the very high customization of user accounts which allows creating limited or ...Voucher login & data collect
The Voucher login & data collect method is a convenient way to collect customer data and allow login using the Login Code. From Login forms choose Voucher login & data collect.When you click on the + button, this login form will be added as the login ...One Time Password
One-time password-based access provides a convenient method for collecting users' valid phone numbers, which can later be utilised for marketing purposes. Users will receive free access to WiFi based on the code sent to their phone number. When you ...Login or Sign Up
Full business automation can be achieved if you allow the signup method for account creation from the Splash page. New users will be able to Signup for free access or pay with a credit card for high-tiered plans. To allow users to signup for free, ...Social network
Accessing social networks is an effective way to obtain users’ valid email addresses. Users can enjoy free WiFi access by logging in with their preferred social media accounts. In return, you will receive the email addresses associated with these ...